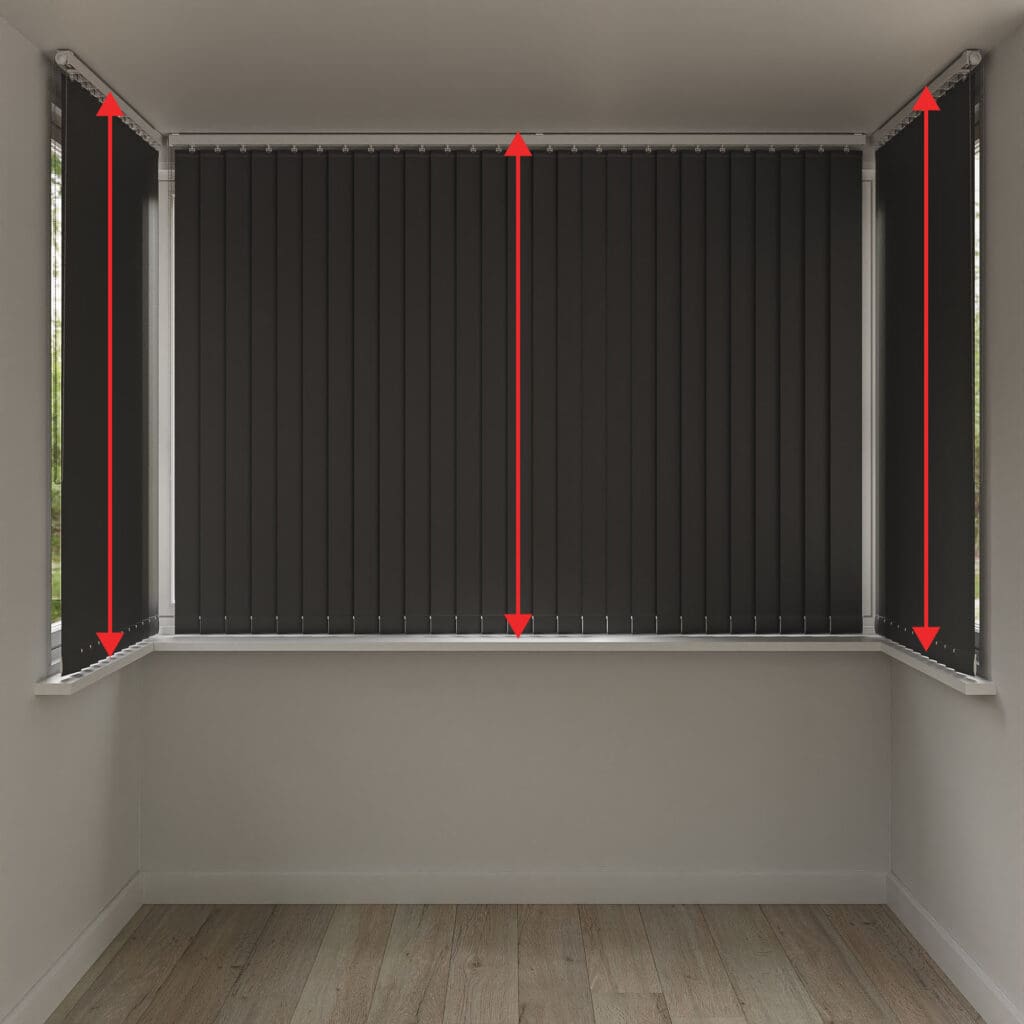
Measuring for Vertical Blinds

Select Your Window Type

Standard Window

Choose your fit

Multiple fitting options are available for standard windows.

Choose from the options below

Option 1: Inside Recess
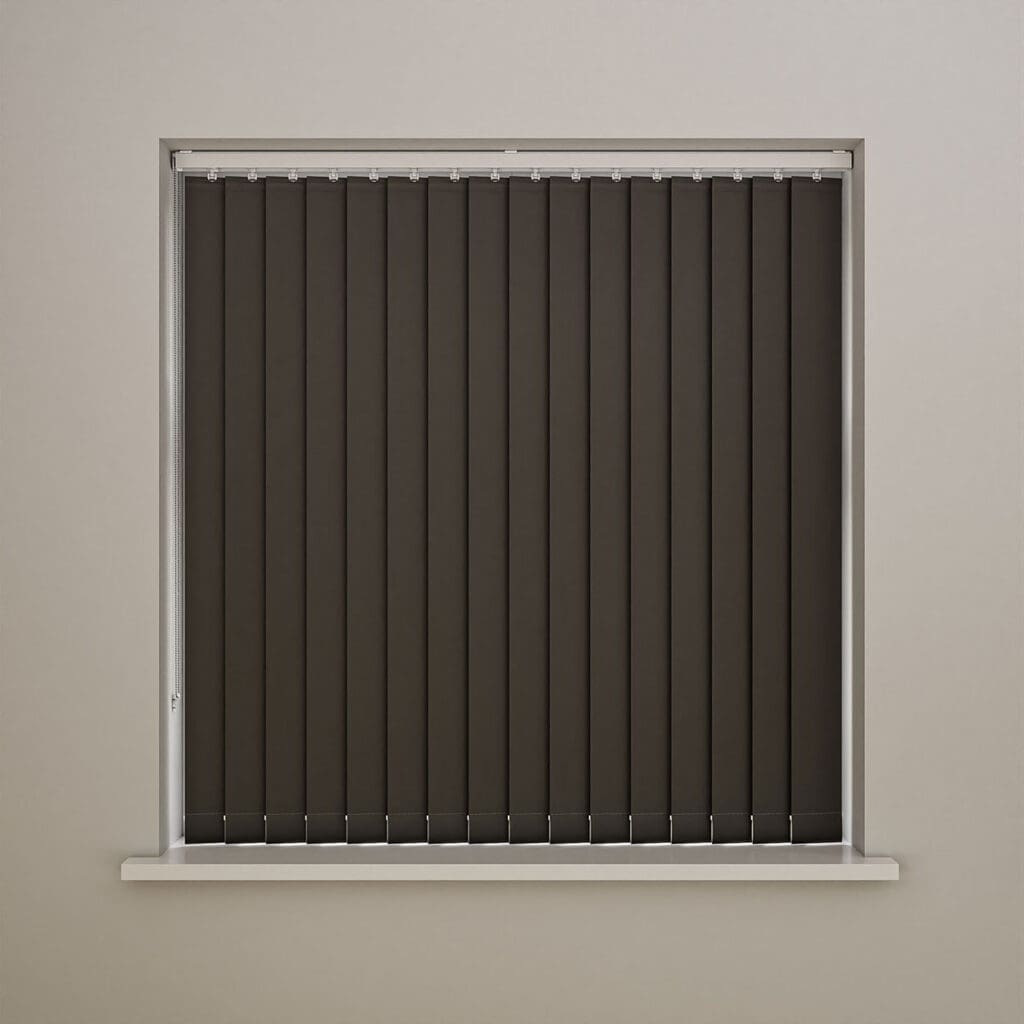
To mount your vertical blind within your window recess, follow the steps below. Recommended
Option 2: Exact Size
If you know your exact drop and width requirements, follow the steps below.

Inside Recess

Step 1 – Width Measurement

Step 1 – Width Measurement

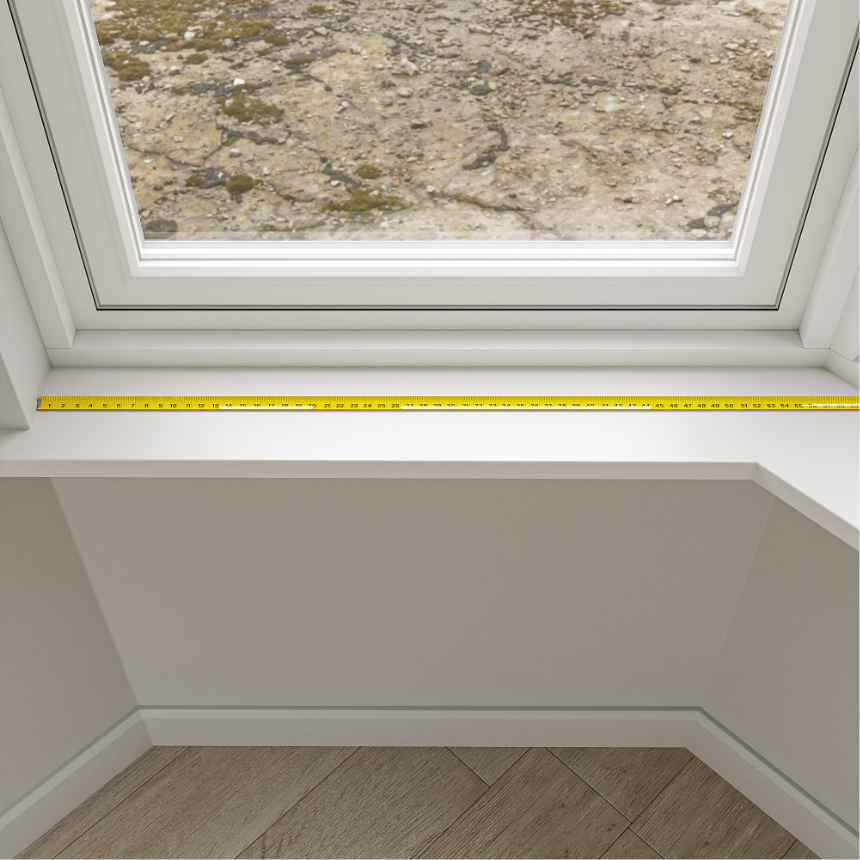
Measure the width of the recess in at least three places where you would like to install your blind. You will use the smallest of these figures as your width measurement when ordering your blind.

Important!

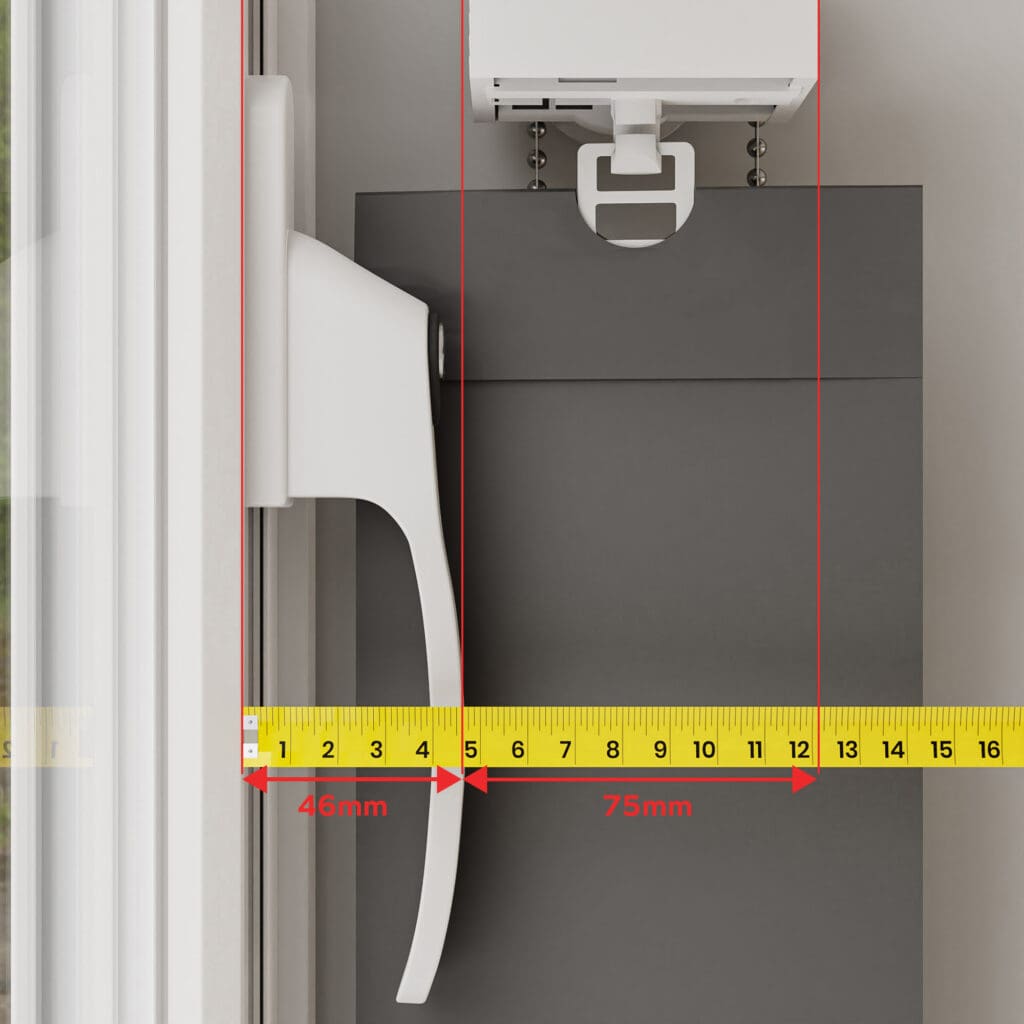
Check your depth – To allow sufficient room for your blind to operate, it’s important that there is sufficient depth clearance (75mm for our vertical blinds) between the farthest point of any obstruction and the front of the recess.

Step 2 – Drop Measurements

Step 2 – Drop Measurements

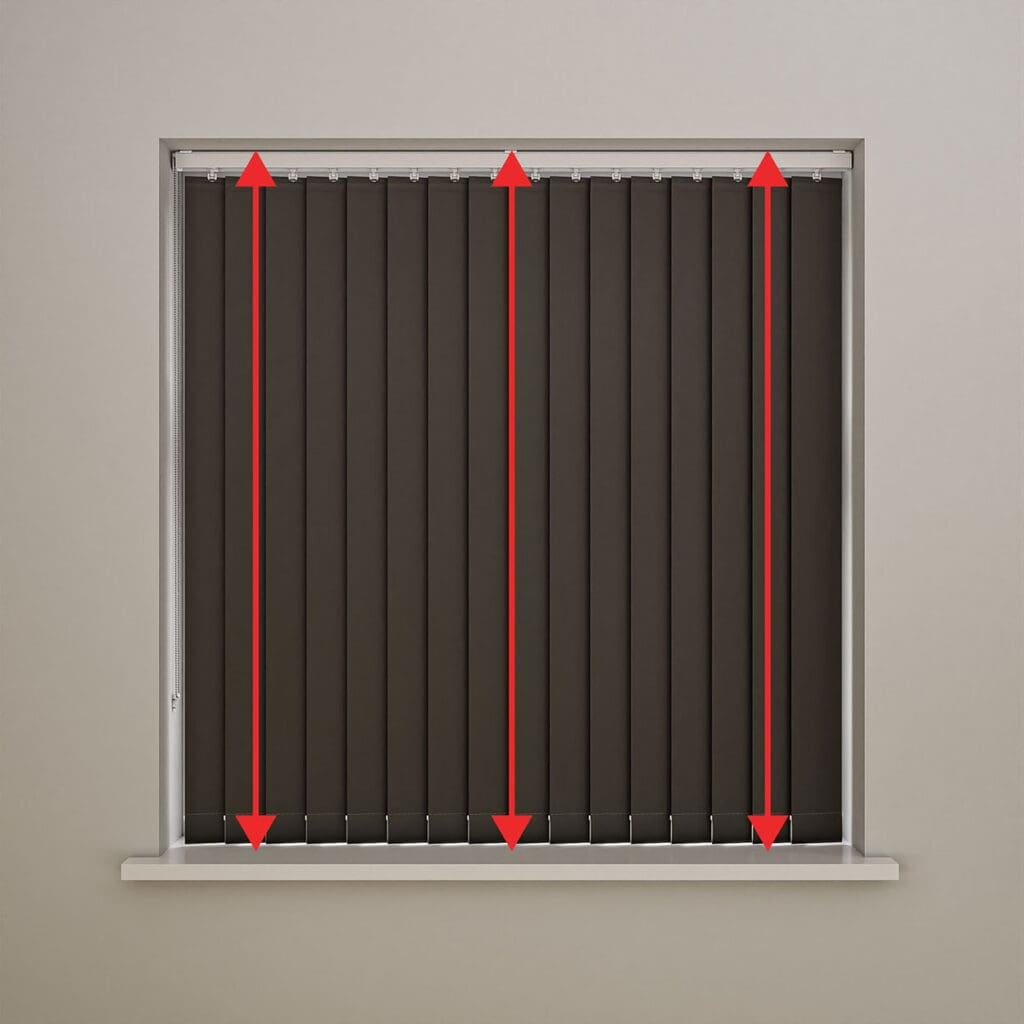
Measure the height of the recess in at least three places where you would like to install your blind. You will use the smallest of these figures as your drop measurement when ordering your blind. This drop figure represents the height of the whole blind, including the slats and headrail together.

Step 3 – Recess Fitting Option

Step 3 – Recess Fitting Option

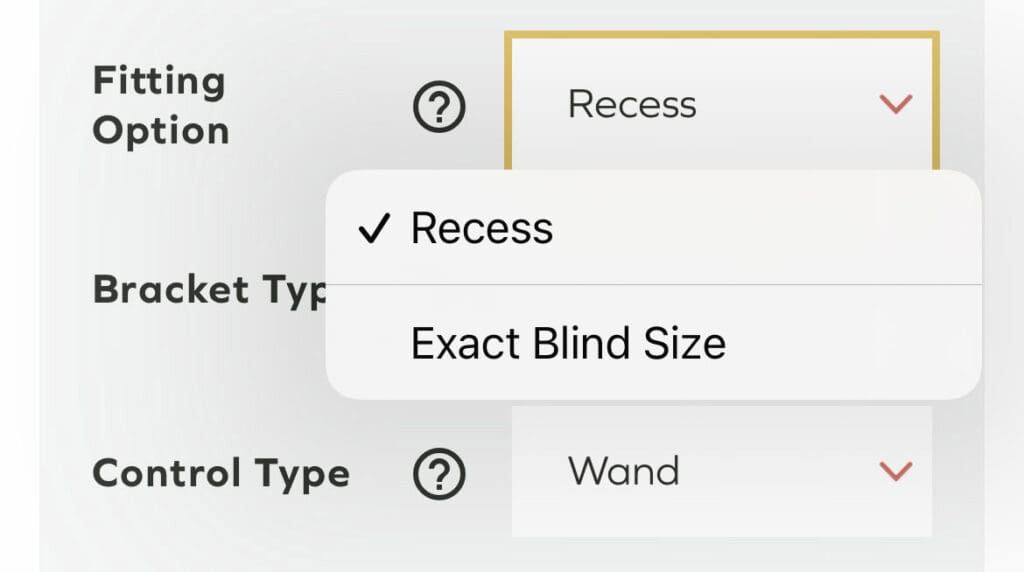
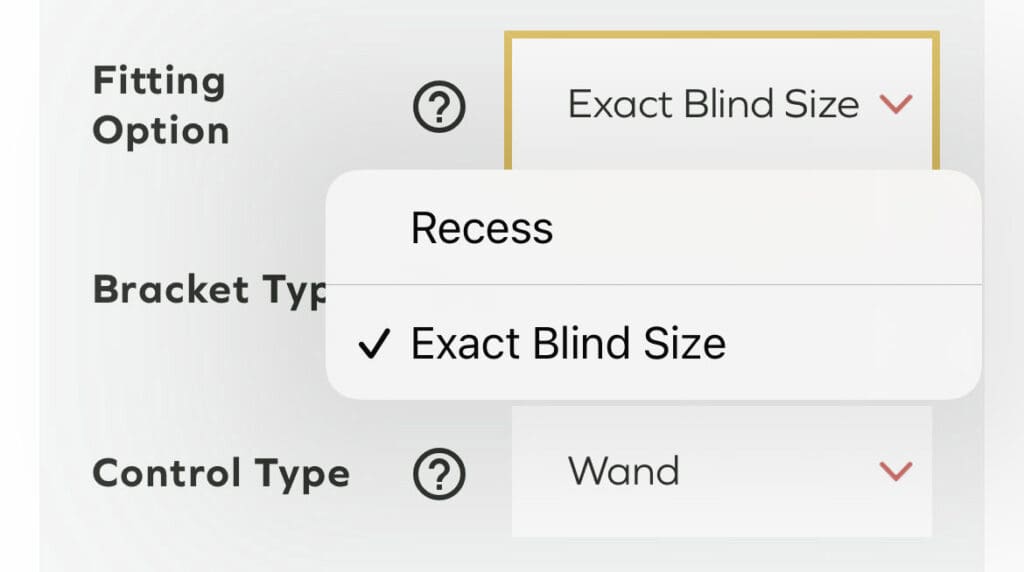
When ordering your blind, select the “Recess” fitting option. We’ll then adjust the measurement to allow for the appropriate brackets.

HAPPY MEASURING? SHOP VERTICAL BLINDS

Exact Size

Step 1 – Width Measurement

Step 1 – Width Measurement

First determine how far you want your blind to overlap your window recess on each side. Make sure to include this overlap when measuring your width.

Important!

Overlap – We suggest an overlap of at least 50mm on either side of the window recess. This means including an extra 100mm in your width measurement (in addition to the width of the recess). Top tip: check for any obstructions, such as light switches, to ensure that no objects conflict with the blind overlap.

Improved light exclusion – The greater the overlap, the more effective your blinds will be in eliminating light from outside.

Step 2 – Drop Measurements

Step 2 – Drop Measurements

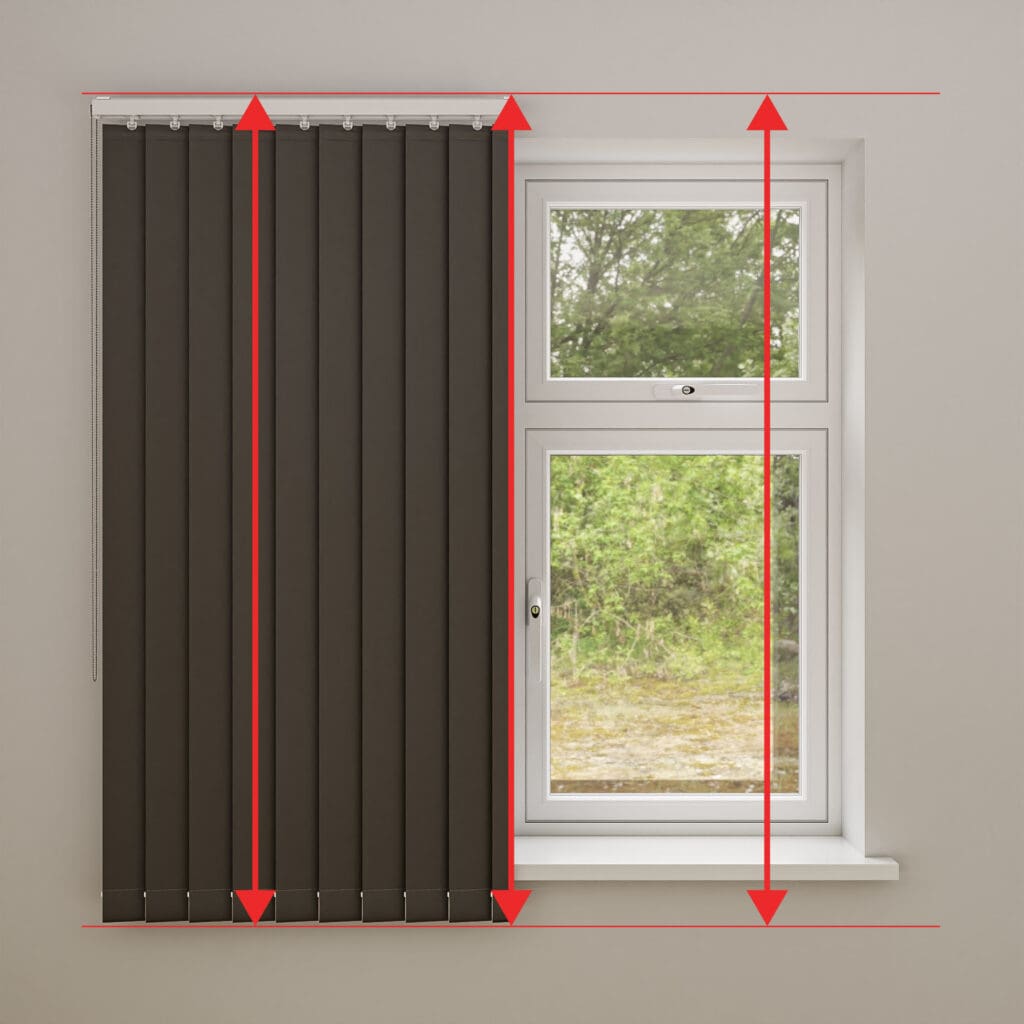
First determine where you’d like your headrail to be positioned. Measure the distance between the top of the headrail and where you’d like your slats to end at the bottom. This drop figure represents the height of the whole blind, including the slats and headrail together.

Important!

Overlap (top) – We suggest an overlap of at least 50mm beyond the top of the window recess.

Overlap (bottom) – Top tip: Obstructions, such as a radiator, may limit your bottom overlap. If the window sill protrudes by over 50mm, the bottom of your blind should be placed at this point. Otherwise, the amount of bottom overlap is a matter of personal taste.

Step 3 – Exact Fitting Option

Step 3 – Exact Fitting Option

When making your order, select the “Exact” fitting option.

HAPPY MEASURING? SHOP VERTICAL BLINDS

Angled Bay Window

Step 1 – Calculate Depth

Step 1 Check for obstruction rkmqx5

Step 1 – Depth

Measure obstructions depth

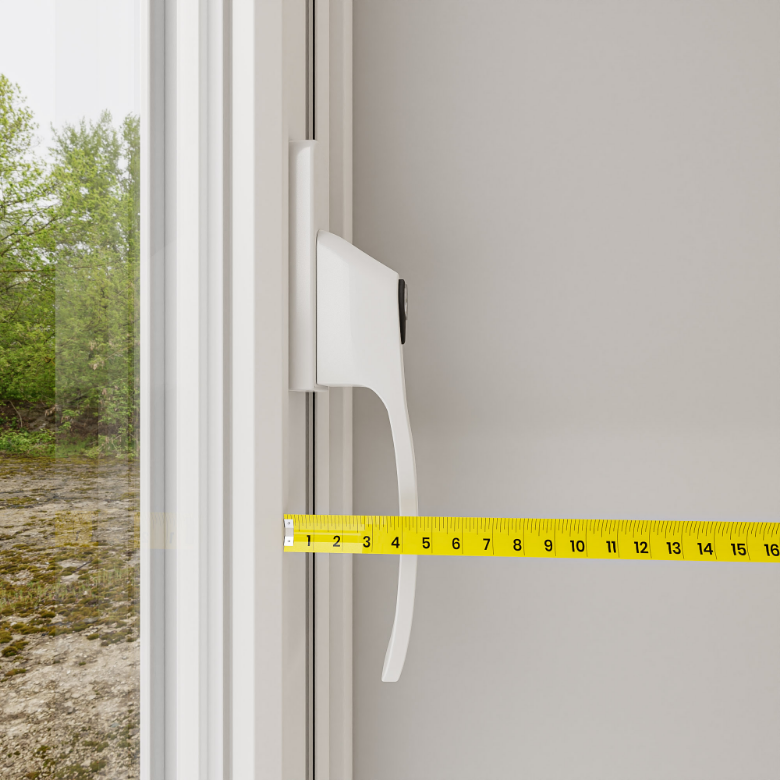
Identify any obstructions (e.g. vents or handles) and measure their farthest point from the window frame. This is the obstruction depth.

Total Depth Calculation

Total Depth Calculation

To calculate your total depth, add the obstruction depth to the clearance needed for your blinds (75mm for our vertical blinds). This new figure is your total depth.

Useful Suggestions

Example – For a window handle protruding 46mm from the window frame, the calculation would be as follows: 75mm + 46mm = 121mm total depth.

Make a note of the total depth – It’s important that you have this figure for the later steps.

Do you have guide templates?

If you ordered blind samples, the templates should be included in your sample box.

Choose from the options below

Option 1: I've got the guides
Great, this will make measuring for your bay window blinds much easier!
Recommended
Option 2: I will make my own
Create your own measuring templates by following these simple steps.

Step 2 – Measuring Templates

Step 2   Measuring Templates in   ive got the guides dckldg

Step 2 – Measuring Templates

We supply measuring templates that you can use to measure for bay windows. (You can choose to receive measuring templates when ordering samples.)

If you have your measuring templates, use a pencil or pen to mark them at the total depth – i.e. the obstruction depth plus the relevant measurement on the bay measuring guide (75mm for vertical blinds).

Step 3 – Mark Your Measuring Points

Step 3 Mark your measuring points in   ive got the guides aklcmx

Step 3 – Mark Your Measuring Points

Please note: Check your window for any obstructions such as handles or vents. You will need to add the depth of any obstruction to the depth of your blind.

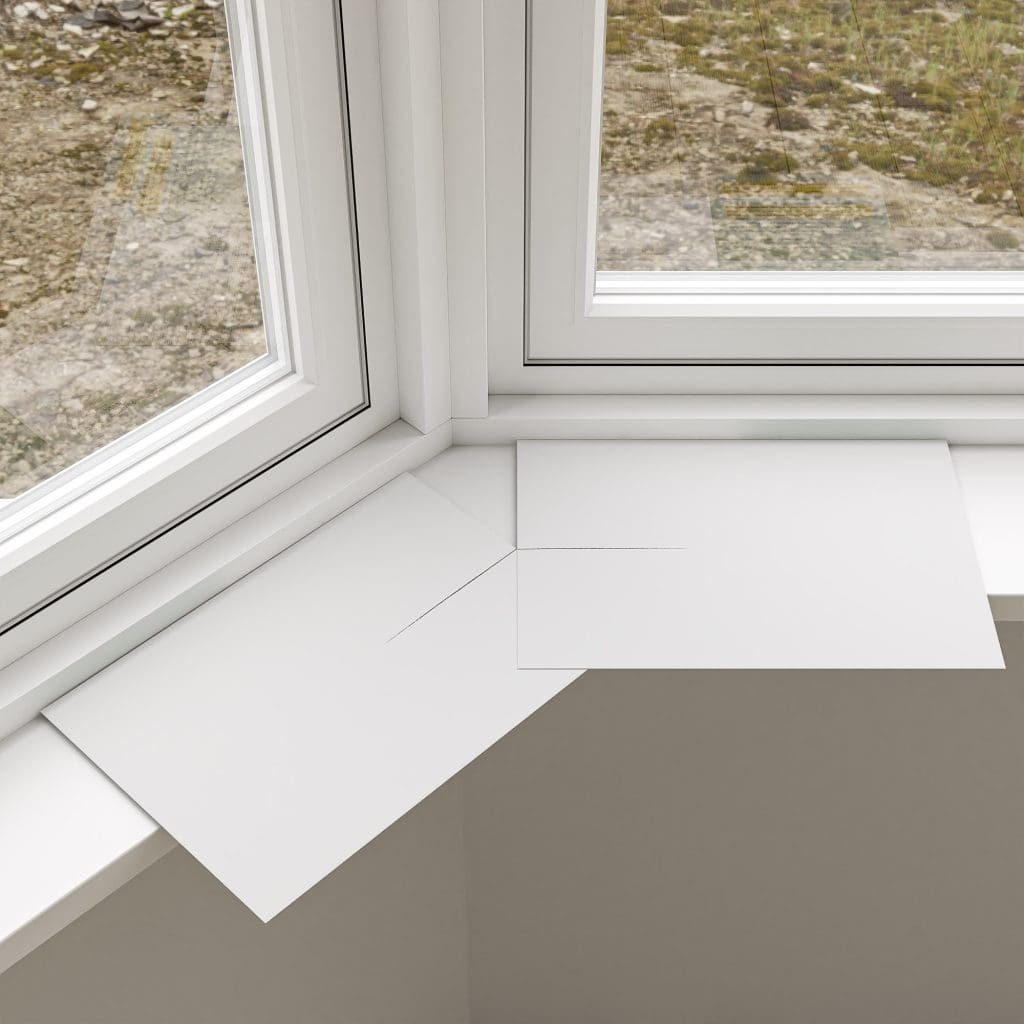
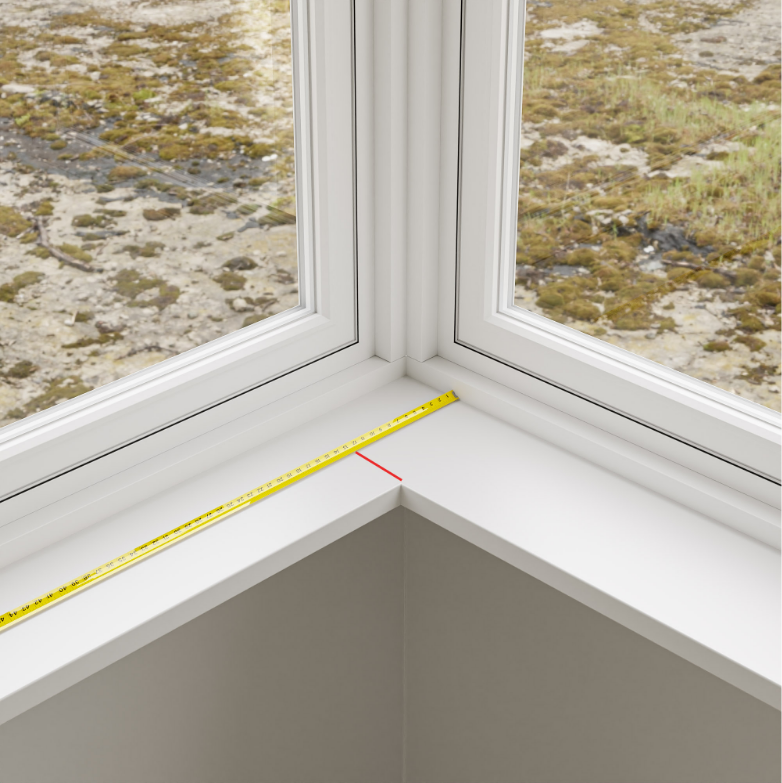
1.Place your measuring cards flat on the window sill, at either side of a corner in your bay.

2.Bring the cards together, with the tops of the cards flush against the window frames, until the two total depth marks are touching.

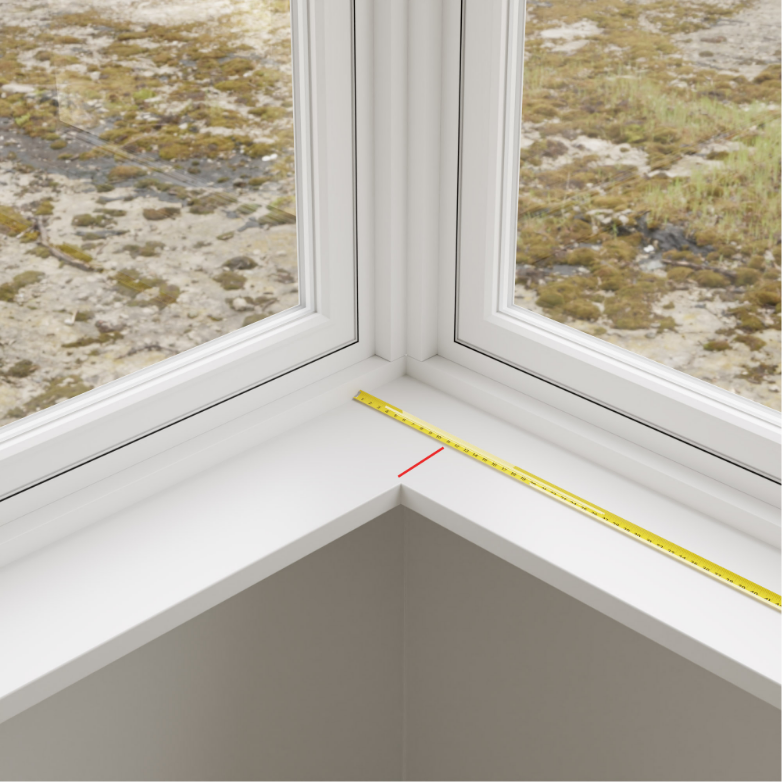
3.Ensuring the cards remain flush to the window frames and keeping the total depth marks in contact, use a pencil to mark the window sill where the two total depth marks on your measuring templates are in contact.

4.Repeat the above steps for each corner in your window bay.

5.Mark your end measuring points (i.e. where you want your blinds to fit at either side of your bay window) according to your personal preference. Be mindful of any obstructions at either side of your window bay.

Step 4 – Width Measurements

grey f4f6f5 sdyog7

Step 4 – Width Measurements

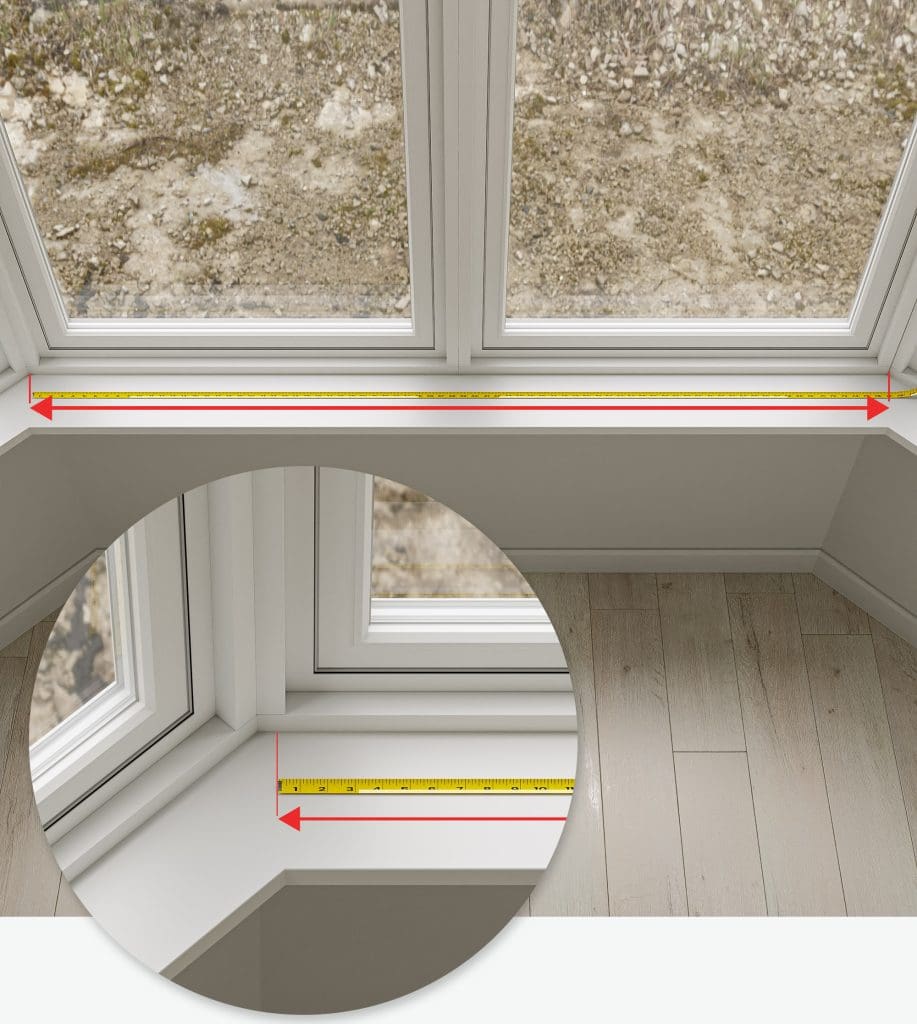
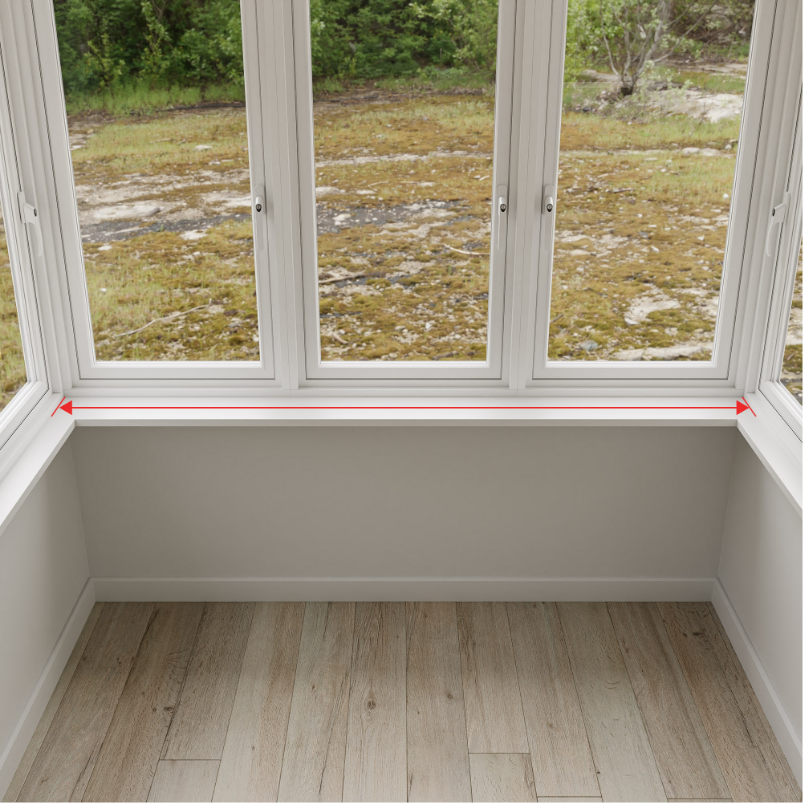
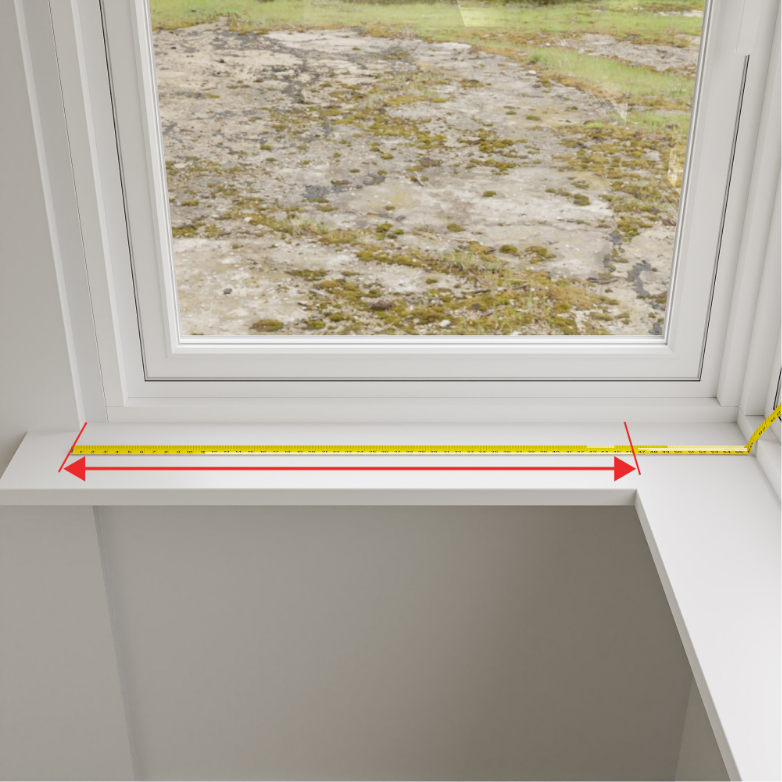
All your measuring points are now ready. You should have a measuring point at each corner, plus two end measuring points. These allow you to make a width measurement for each blind.

Step 4   Width measurements end points zcoifa

End Points

Measure the distance between the two measuring points for each window. This will give you the width measurement to use when ordering each blind.

Step 5 – Drop Measurements

Step 5 – Drop Measurements

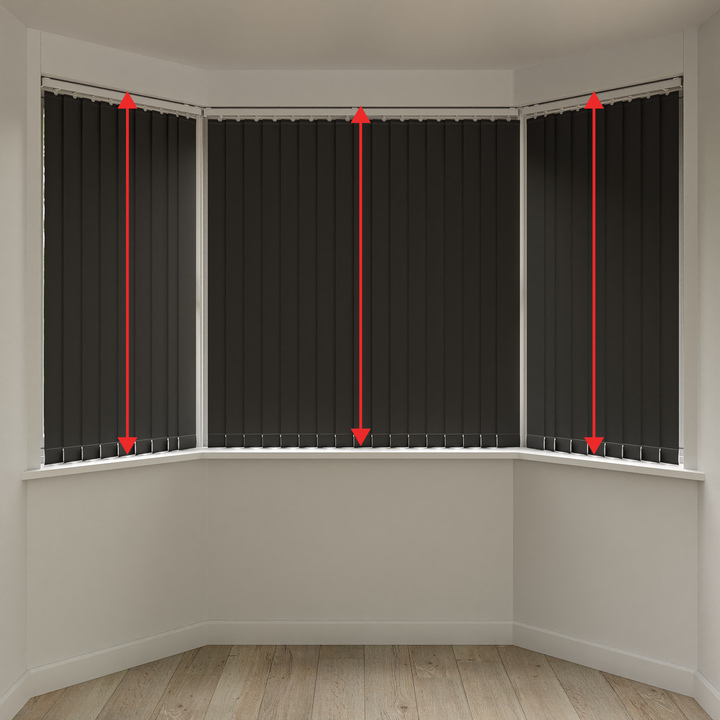
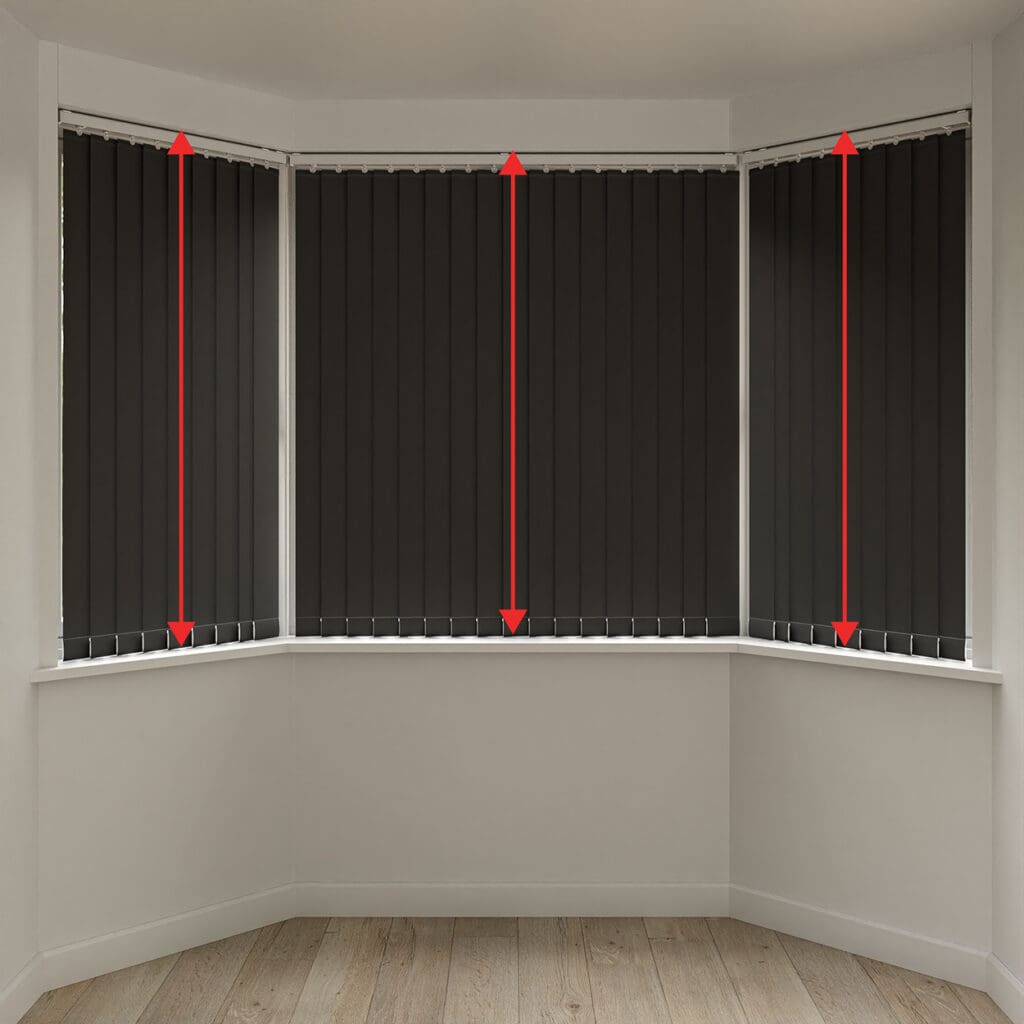
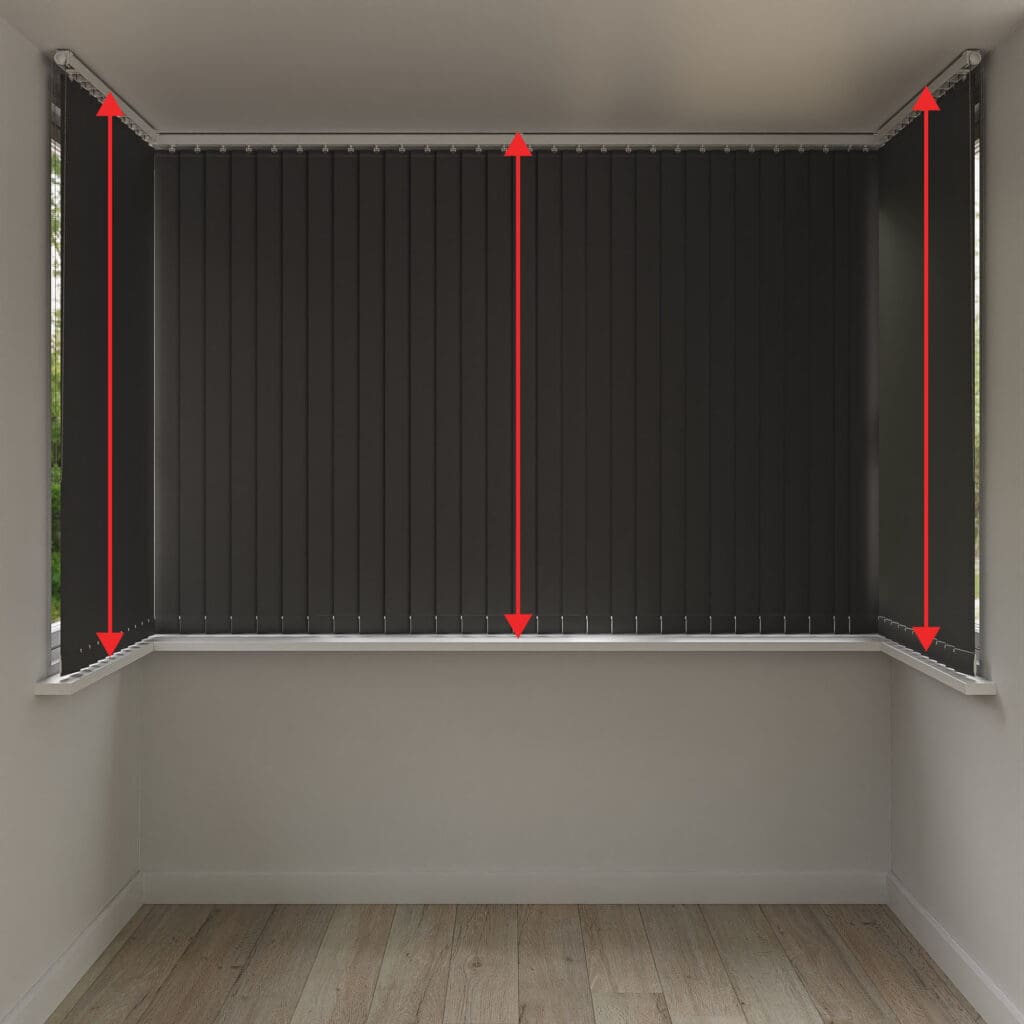
Measure the height of the bay in at least three places where you would like to install your blind. You will use the smallest of these figures as your drop measurement when ordering your blinds.

Step 6 (Final Step) – Recess

Step 6 (Final Step) – Recess

When ordering, choose the “Recess” fitting option, indicating that adjustments for brackets should be made.

HAPPY MEASURING? SHOP VERTICAL BLINDS

Step 2 – Measuring Templates

Pencil marking 2 exh36c

Step 2 – Measuring Templates

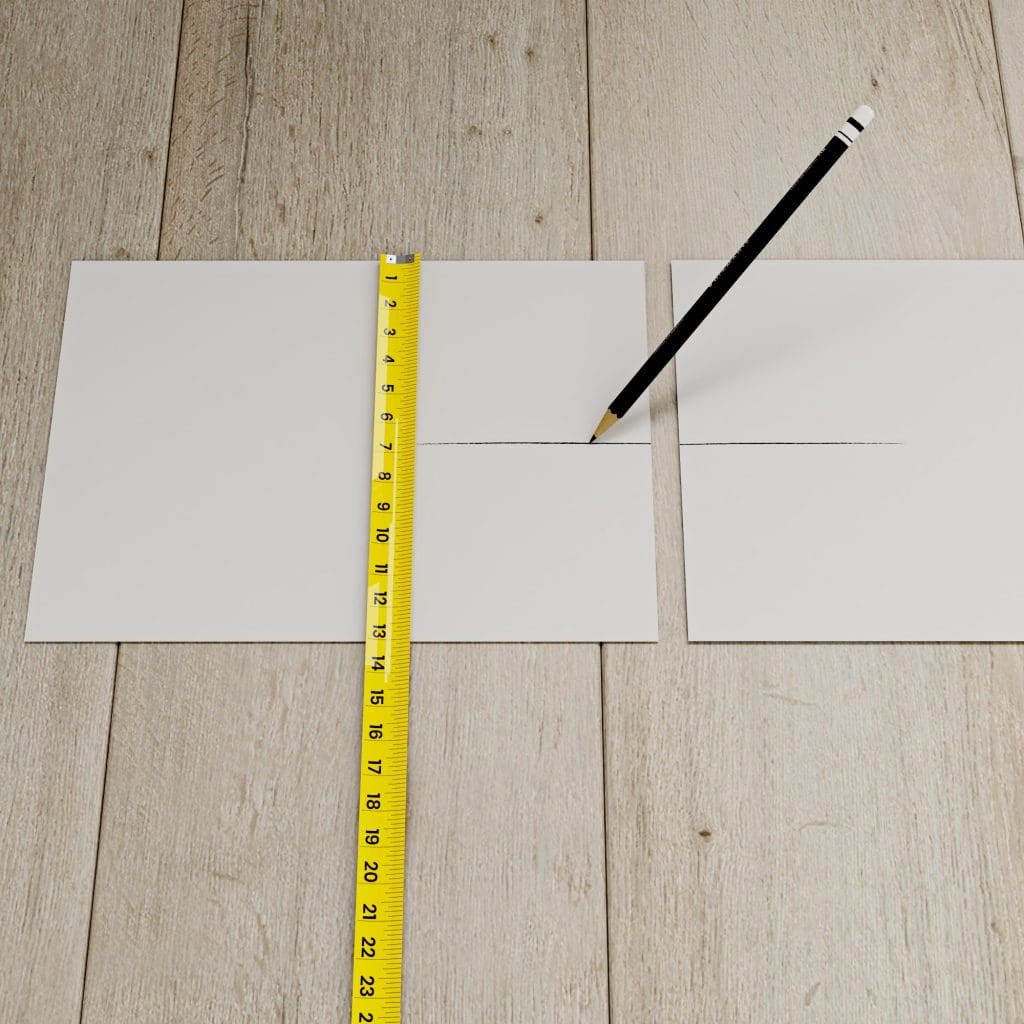
Here’s how you can create your own measuring templates using paper and a pen or pencil:

1. Lay two sheets of paper side by side.

2. With a ruler or tape measure, mark both sheets at the total depth (calculated in Step 1).

Step 3 – Mark Your Measuring Points

Step 3 Mark your measuring points manual yb7ubs

Step 3 – Mark Your Measuring Points

Please note: Check your window for any obstructions such as handles or vents. You will need to add the depth of any obstruction to the depth of your blind.

1.Place your measuring cards flat on the window sill, at either side of a corner in your bay.

2.Bring the cards together, with the tops of the cards flush against the window frames, until the two total depth marks are touching.

3.Ensuring the cards remain flush to the window frames and keeping the total depth marks in contact, use a pencil to mark the window sill where the two total depth marks on your measuring templates are in contact.

4.Repeat the above steps for each corner in your window bay.

5.Mark your end measuring points (i.e. where you want your blinds to fit at either side of your bay window) according to your personal preference. Be mindful of any obstructions at either side of your window bay.

Step 4 – Width Measurements

grey f4f6f5 sdyog7

Step 4 – Width Measurements

All your measuring points are now ready. You should have a measuring point at each corner, plus two end measuring points. These allow you to make a width measurement for each blind.

Step 4   Width measurements end points zcoifa

For each window, measure the distance between its two measuring points. This is the width measurement you will use when ordering each blind.

Step 5 – Drop Measurements

Step 5 – Drop Measurements

Measure the height of the bay in at least three places where you would like to install your blind. You will use the smallest of these figures as your drop measurement when ordering your blinds.

Step 6 (Final Step) – Recess

Step 6 (Final Step) – Recess

When ordering, choose the “Recess” fitting option, indicating that adjustments for brackets should be made.

HAPPY MEASURING? SHOP VERTICAL BLINDS

Square Bay Window

Choose from the options below

Option 1: Front Primary
The front blind spans the entire width of the bay, with the two side return blinds sitting behind.
Option 2: Side Primary
The front blind is positioned between the two side blinds, each of which span the full depth of the bay.

Front Primary

Step 1 – Width Measurement

Step 1 Front hcluob

Step 1 – Width Measurement

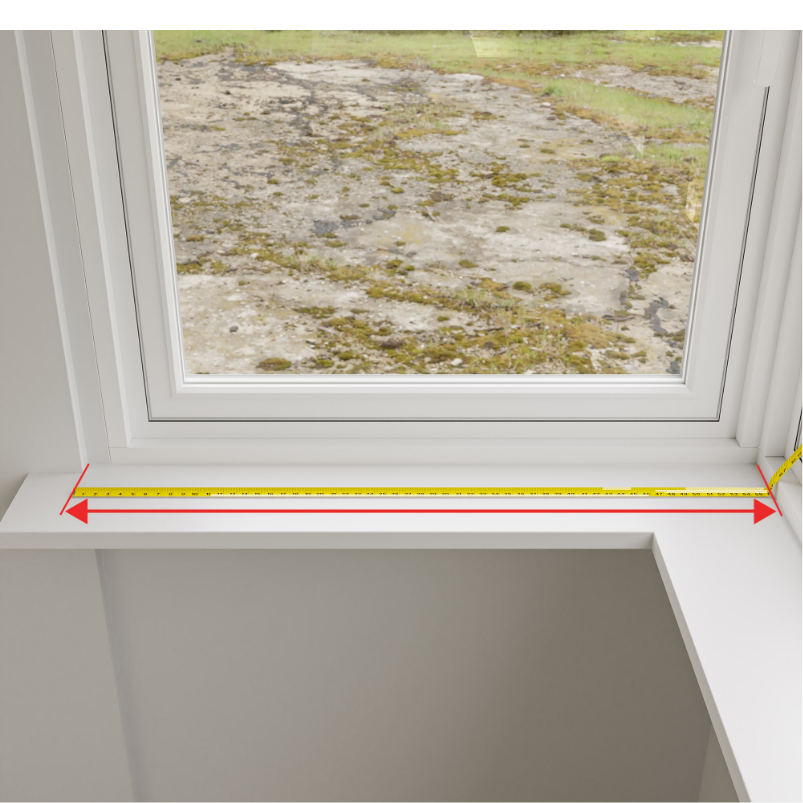
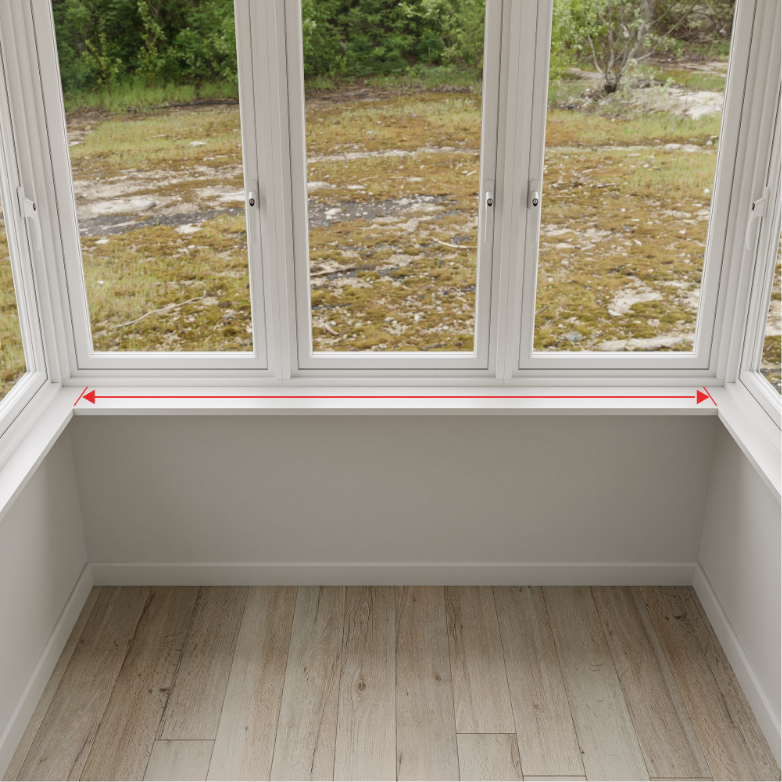
Measure the total width of the bay’s front window, including the frame. Use this figure as your width measurement when you order your front blind.

Important!

Obstruction depth – For any obstructions, such as vents or handles, measure their furthest point from the window frame. This is the obstruction depth; please make a note of this figure.

Step 2 – Depth Calculation

Step 2 – Depth Calculation

To calculate your total depth, add the obstruction depth (previously calculated) to the clearance needed for your blinds (75mm for our vertical blinds). This new figure is your total depth.

Useful Suggestions

Example – For a window handle protruding 46mm from the window frame, the calculation would be as follows: 75mm + 46mm = 121mm total depth.

Make a note of the total depth – It’s important that you have this figure for the later steps.

Step 3 – Mark the Total Depth

Step 3 Mark total depth wwb4al

Step 3 – Mark the Total Depth

Mark the total depth  with a pencil on either side of your square bay window, as shown. In later steps, these marks are referred to as “total depth marks”.

Step 4 – Side Window Measurements

Step 4 Step 4 a Side Window Measurements sfadat

Step 4 – Side Window Measurements

Measure the distance from your total depth mark to where you want the return blind to end. This is your width measurement for ordering the return blind. Repeat for the other side of the square bay, ensuring you have a width measurement for each side blind.

Step 5 – Drop Measurements

Step 5 – Drop Measurements

Measure the height of the bay in at least three locations where you want to install your blind. Use the smallest of these figures as your drop measurement when ordering your blinds.

Step 6 – Recess Fitting Option

Step 6 – Recess Fitting Option

When ordering, choose the “Recess” fitting option, indicating that adjustments for brackets should be made.

HAPPY MEASURING? SHOP VERTICAL BLINDS

Side Primary

Step 1 – Width Measurement for the Sides

Step 1 a Width Measurement for the Sides wjg6ci

Step 1 – Width Measurement for the Sides

Measure the entire width of the bay’s side windows, including the frames. Use these measurements as your width references when ordering your side blinds.

Important!

Obstruction depth
Identify any obstructions, such as vents or handles, and measure their farthest point from the window frame. This measurement is the obstruction depth. Measure and note the obstruction depth for each of your side windows; you’ll need these figures for later.

Step 2 – Depth Calculation for the Sides

Step 2 – Depth Calculation for the Sides

To calculate your total depth, add the obstruction depth (previously calculated) to the clearance needed for your blinds (75mm for our vertical blinds). This new figure is your total depth. Perform this calculation for each side window.

Useful Suggestions

Example – For a window handle protruding 46mm from the window frame, the calculation would be as follows: 75mm + 46mm = 121mm total depth.

Make a note of the total depth for each side window – It’s important that you have these figures for the later steps.

Step 3 – Mark the Total Depth

Step 3 Mark total depths psb4cg

Step 3 – Mark the Total Depth

Mark the total depth on either side of your square bay window using a pencil. These marks are referred to as “total depth marks” in later steps.

Step 4 – Width Measurement for the Front

Step 4 side rbgi1n

Step 4 – Width Measurement for the Front

Measure the distance between your two total depth marks. When ordering your front blind, use this figure as your width measurement.

Step 5 – Drop Measurements

Step 5 – Drop Measurements

Measure the recess height where you intend to install your blind, measuring at three separate points. Use the smallest of these figures as your drop measurement when making your order.

Step 6 – Recess Sizing

Step 6 – Recess Sizing

When ordering, choose the “Recess” fitting option, indicating that adjustments for brackets should be made.

HAPPY MEASURING? SHOP VERTICAL BLINDS